This is the last part of a three part tutorial on content providers. In this post I am going to show you how to write your own content provider. I covered the common concepts of content providers in my first post of this series. And in the second part I've covered how to use content providers as a client. If you haven't read the previous posts you might want to do so now.
Implementing a content provider involves always the following steps:
- Create a class that extends
ContentProvider - Create a contract class
- Create the UriMatcher definition
- Implement the
onCreate()method - Implement the
getType()method - Implement the CRUD methods
- Add the content provider to your
AndroidManifest.xml
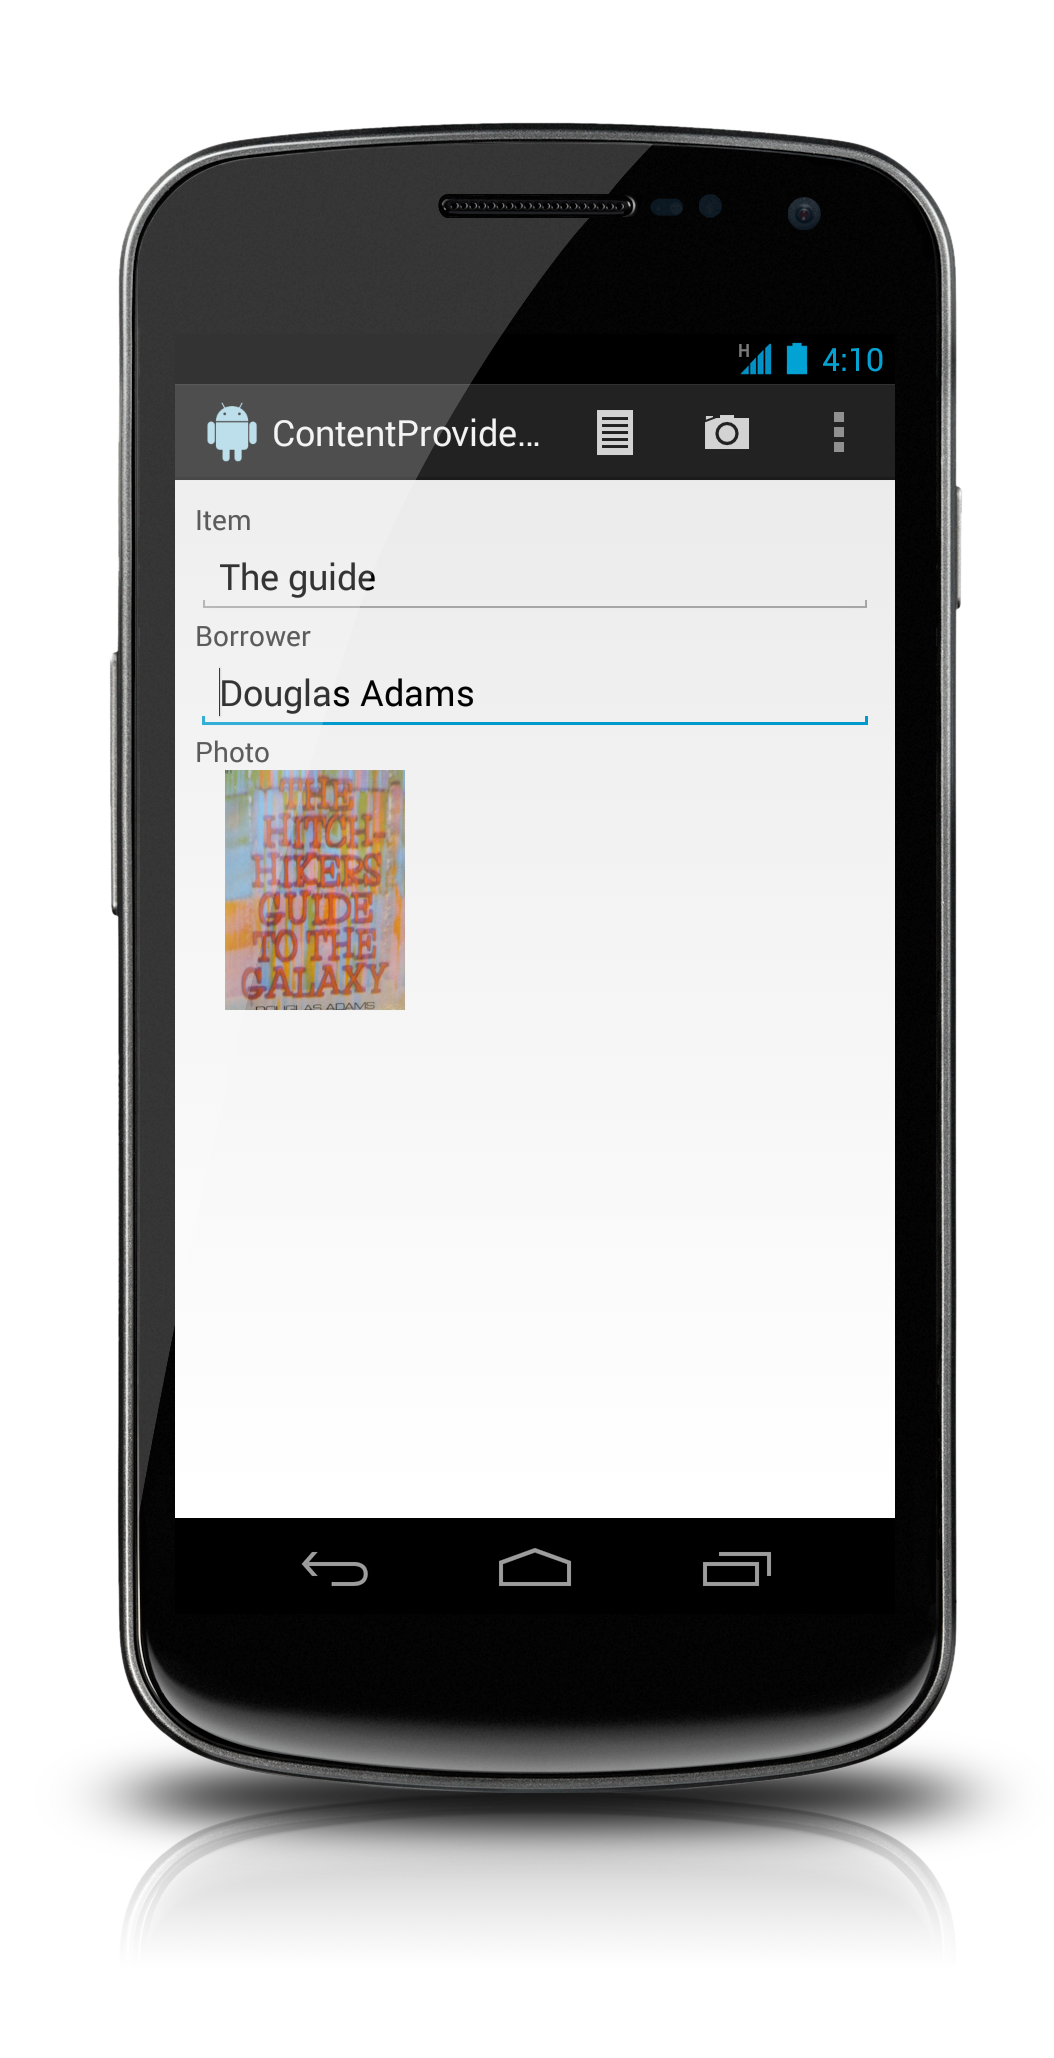
Based on a sample project I will expand on all of these topics. The sample project is a simple app that you can use to manage lent items. For the sake of this sample I use a very simple data model, which consists of only two tables: items and photos. While the table structure would allow to add multiple photos to one item, the app doesn't support it. In my arbitrary use case there exists at most one photo per lent item. You can get the sample project at bitbucket.
Below you can see the sample app in action - nothing too fancy 🙂
Create a class that extends ContentProvider
You start by sub-classing ContentProvider. Since ContentProvider is an abstract class you have to implement the six abstract methods. These methods are explained in detail later on, for now simply use the stubs created by the IDE of your choice.
| Method | Usage |
|---|---|
| onCreate() | Prepares the content provider |
| getType(Uri) | Returns the MIME type for this URI |
| delete(Uri uri, String selection, String[] selectionArgs) | Deletes records |
| insert(Uri uri, ContentValues values) | Adds records |
| query(Uri uri, String[] projection, String selection, String[] selectionArgs, String sortOrder) | Return records based on selection criteria |
| update(Uri uri, ContentValues values, String selection, String[] selectionArgs) | Modifies data |
Create a contract class
Up to now your code is still missing most of the functionality. But before implementing the CRUD methods you should think about your role as a provider. Content providers by its very definition provide data to clients. Those clients need to know how to access your data. And you should treat your URIs and authority like an API. You basically enter into a contract with your client. And your public API should reflect this.
Thus the official Android documentation recommends to create a contract class. This class defines all publicly available elements, like the authority, the content URIs of your tables, the columns, the content types and also any intents your app offers in addition to your provider.
This class is your public API. What you define here is what clients can use. It's also the abstraction you provide. You can do behind the scenes whatever you like. The client won't notice. You can change the data structure without problems - if your contract class remains unchanged.
The downside is: You shouldn't change the contract in any way that might break existing clients. It's a contract after all 🙂
If you really think you must get rid of something you provided earlier on, use analytics to find out when a deprecated feature isn't used anymore.
So here is what a typical contract class looks like:
public final class LentItemsContract {

	/**
	 * The authority of the lentitems provider.
	 */
	public static final String AUTHORITY =
	      "de.openminds.samples.cpsample.lentitems";
	/**
	 * The content URI for the top-level
	 * lentitems authority.
	 */
	public static final Uri CONTENT_URI =
	      Uri.parse("content://" + AUTHORITY);

	/**
	 * Constants for the Items table
	 * of the lentitems provider.
	 */
	public static final class Items
	      implements CommonColumns { ... }

	/**
	 * Constants for the Photos table of the
	 * lentitems provider. For each item there
	 * is exactly one photo. You can
	 * safely call insert with the an already
	 * existing ITEMS_ID. You won't get constraint
	 * violations. The content provider takes care
	 * of this.<br>
	 * Note: The _ID of the new record in this case
	 * differs from the _ID of the old record.
	 */
	public static final class Photos
	      implements BaseColumns { ... }

	/**
	 * Constants for a joined view of Items and
	 * Photos. The _id of this joined view is
	 * the _id of the Items table.
	 */
	public static final class ItemEntities
	      implements CommonColumns { ...}

	/**
	 * This interface defines common columns
	 * found in multiple tables.
	 */
	public static interface CommonColumns
	      extends BaseColumns { ... }
}
You can see the exported tables Photos, Items and ItemEntities which are separate inner classes of the contract class. There is also the authority of the provider and the root content URI. If your app also exports activities accessible via intents you should document those here as well. And you should document any permissions your provider uses. The latter is omitted here because I will write an extra post about it in the future.
One thing in the above snippet is noteworthy: The inner class ItemEntities represents a virtual table that doesn't exist in the database. In this case I simply use joins in the query method but you could also use views within the database to back up virtual tables. Clients cannot join tables of content providers, thus you should consider offering plausible joins yourself.
The following snippet shows what to do within the inner classes of your contract class:
/**
 * Constants for the Items table
 * of the lentitems provider.
 */
public static final class Items
      implements CommonColumns {
	/**
	 * The content URI for this table.
	 */
	public static final Uri CONTENT_URI =
	      Uri.withAppendedPath(
	            LentItemsContract.CONTENT_URI,
	            "items");
	/**
	 * The mime type of a directory of items.
	 */
	public static final String CONTENT_TYPE =
	      ContentResolver.CURSOR_DIR_BASE_TYPE +
	      "/vnd.de.openminds.lentitems_items";
	/**
	 * The mime type of a single item.
	 */
	public static final String CONTENT_ITEM_TYPE =
	      ContentResolver.CURSOR_ITEM_BASE_TYPE +
	      "/vnd.de.openminds.lentitems_items";
	/**
	 * A projection of all columns
	 * in the items table.
	 */
	public static final String[] PROJECTION_ALL =
	      {_ID, NAME, BORROWER};
	/**
	 * The default sort order for
	 * queries containing NAME fields.
	 */
	public static final String SORT_ORDER_DEFAULT =
	      NAME + " ASC";
}
As you can see the inner classes are the place for any column definitions, the content URIs and the content types of the respective tables.
Create the UriMatcher definitions
To deal with multiple URIs Android provides the helper class UriMatcher. This class eases the parsing of URIs. In the next code sample you can see that you initialize the UriMatcher by adding a set of paths with correspondig int values. Whenever you ask if a URI matches, the UriMatcher returns the corresponding int value to indicate which one matches. It is common practise to use constants for these int values. The code sample shows how to add id based paths as well as dir based paths.
// helper constants for use with the UriMatcher
private static final int ITEM_LIST = 1;
private static final int ITEM_ID = 2;
private static final int PHOTO_LIST = 5;
private static final int PHOTO_ID = 6;
private static final int ENTITY_LIST = 10;
private static final int ENTITY_ID = 11;
private static final UriMatcher URI_MATCHER;

// prepare the UriMatcher
static {
	URI_MATCHER = new UriMatcher(UriMatcher.NO_MATCH);
	URI_MATCHER.addURI(LentItemsContract.AUTHORITY,
	      "items",
	      ITEM_LIST);
	URI_MATCHER.addURI(LentItemsContract.AUTHORITY,
	      "items/#",
	      ITEM_ID);
	URI_MATCHER.addURI(LentItemsContract.AUTHORITY,
	      "photos",
	      PHOTO_LIST);
	URI_MATCHER.addURI(LentItemsContract.AUTHORITY,
	      "photos/#",
	      PHOTO_ID);
   URI_MATCHER.addURI(LentItemsContract.AUTHORITY,
         "entities",
         ENTITY_LIST);
   URI_MATCHER.addURI(LentItemsContract.AUTHORITY,
         "entities/#",
         ENTITY_ID);
}
You pass the authority, a path pattern and an int value to the addURI() method. Android returns the int value later on when you try to match patterns.
The patterns of the sample above are the most common patterns. But you are not limited to those. Android's calendar content provider for examples offers search URIs to find certain instances of events. And the content provider for contacts also offers non standard URIs - for example to provide access to the contact photo. You can take a look at the source of CalendarProvider2 or ContactsProvider2 to see how to use those non-standard URIs with the UriMatcher.
Implement the onCreate() method
Back to the actual content provider class. First implement the onCreate() method.
The onCreate() method is a lifecycle method and runs on the UI thread. Thus you should avoid executing any long-lasting tasks in this method. Your content provider is usually created at the start of your app. And you want this to be as fast as possible. So even if your users do not get any "Application Not Responding" error messages, they won't like anything that delays the perceived starting time of your app. Thus consider to do any long lasting stuff within the CRUD methods.
Normally content providers use a database as the underlying data store. In this case you would create a reference to your SQLiteOpenHelper in onCreate() - but you wouldn't try to get hold of an SQLiteDatabase object. In the original version of this post, my recommendation has been to get a reference to the database in this method. Please, do not do this!
public class LentItemsProvider extends ContentProvider {

	private LentItemsOpenHelper mHelper = null;
	@Override
	public boolean onCreate() {
		mHelper = new LentItemsOpenHelper(getContext());
		return true;
	}

   //...
}
Implement the getType() method
Every content provider must return the content type for its supported URIs. The signature of the method takes a URI and returns a String. The next code sample shows the getType() method of the sample application.
@Override
public String getType(Uri uri) {
   switch (URI_MATCHER.match(uri)) {
   case ITEM_LIST:
      return Items.CONTENT_TYPE;
   case ITEM_ID:
      return Items.CONTENT_ITEM_TYPE;
   case PHOTO_ID:
      return Photos.CONTENT_PHOTO_TYPE;
   case PHOTO_LIST:
      return Photos.CONTENT_TYPE;
   case ENTITY_ID:
      return ItemEntities.CONTENT_ENTITY_TYPE;
   case ENTITY_LIST:
      return ItemEntities.CONTENT_TYPE;
   default:
      return null;
   }
}
As you can see this method is pretty simple. You just have to return the appropriate content type - defined within your contract class - for the URI passed into this method.
UriMatcher
The previous code sample shows how to make use of the UriMatcher. The pattern is also repeated within each of the CRUD methods, so let's digg into it.
When you initialize the UriMatcher you state for each URI which int value belongs to it. Now whenever you need to react diffently depending on the URI you use the UriMatcher. It's match() method returns the int value used during initialization. And usually you use this within a switch statement. This switch statement has case branches for the constants used during initialization.
You can use a "#" as a placeholder for an arbitrary numeric value and a "*" as a placeholder for arbitrary text. All other parts must be exactly as passed to the addURI() method.
Adding records using insert()
As expected this method is used by your clients to insert records into your datastore. The method only makes sense for dir based URIs, thus you first have to check if the right kind of URI is passed to the insert() method. Only then can you actually insert the values into the datastore you use.
The content provider API is record-based - probably since most underlying datastores are record based databases anyway. This makes implementing the insert() method very easy, since it allows you to simply pass the ContentValues object on to the SQLiteDatabase's insert() method.
public Uri insert(Uri uri, ContentValues values) {
   if (URI_MATCHER.match(uri) != ITEM_LIST
         && URI_MATCHER.match(uri) != PHOTO_LIST) {
         throw new IllegalArgumentException(
               "Unsupported URI for insertion: " + uri);
   }
   SQLiteDatabase db = mHelper.getWritableDatabase();
   if (URI_MATCHER.match(uri) == ITEM_LIST) {
      long id =
            db.insert(
                  DBSchema.TBL_ITEMS,
                  null,
                  values);
      return getUriForId(id, uri);
   } else {
      // this insertWithOnConflict is a special case;
      // CONFLICT_REPLACE means that an existing entry
      // which violates the UNIQUE constraint on the
      // item_id column gets deleted. In this case this
      // INSERT behaves nearly like an UPDATE. Though
      // the new row has a new primary key.
      // See how I mentioned this in the Contract class.
      long id =
            db.insertWithOnConflict(
                  DBSchema.TBL_PHOTOS,
                  null,
                  values,
                  SQLiteDatabase.CONFLICT_REPLACE);
      return getUriForId(id, uri);
   }
}

private Uri getUriForId(long id, Uri uri) {
   if (id > 0) {
      Uri itemUri = ContentUris.withAppendedId(uri, id);
      if (!isInBatchMode()) {
         // notify all listeners of changes:
         getContext().
               getContentResolver().
                     notifyChange(itemUri, null);
      }
      return itemUri;
   }
   // s.th. went wrong:
   throw new SQLException(
         "Problem while inserting into uri: " + uri);
}
Notifying listeners of dataset changes
Clients often want to be notified about changes in the underlying datastore of your content provider. So inserting data, as well as deleting or updating data should trigger this notification.
That's why I used the following line in the code sample above:
getContext().
      getContentResolver().
            notifyChange(itemUri, null);
Of course you should only call this method when there really has been a change - that's why I test if the id is a positive number.
Alas, it is not possible to notify the client of the actual change that has occurred. You can only state which URI has changed. Most often this is enough - though sometimes a client would like to know if this was an addition of a record, a deletion of entries or an update. Sadly, Android offers us no possibility to help those clients 🙁
Querying the content provider for records
Returning records from your ContentProvider is pretty easy. Android has a helper class, you can use here: The SQLiteQueryBuilder. Within the query() method of a content provider you can use this class as shown below.
@Override
public Cursor query(Uri uri, String[] projection,
      String selection, String[] selectionArgs,
      String sortOrder) {
   SQLiteDatabase db = mHelper.getReadableDatabase();
   SQLiteQueryBuilder builder = new SQLiteQueryBuilder();
   boolean useAuthorityUri = false;
   switch (URI_MATCHER.match(uri)) {
   case ITEM_LIST:
      builder.setTables(DBSchema.TBL_ITEMS);
      if (TextUtils.isEmpty(sortOrder)) {
         sortOrder = Items.SORT_ORDER_DEFAULT;
      }
      break;
   case ITEM_ID:
      builder.setTables(DBSchema.TBL_ITEMS);
      // limit query to one row at most:
      builder.appendWhere(Items._ID + " = " +
            uri.getLastPathSegment());
      break;
   case PHOTO_LIST:
      builder.setTables(DBSchema.TBL_PHOTOS);
      break;
   case PHOTO_ID:
      builder.setTables(DBSchema.TBL_PHOTOS);
      // limit query to one row at most:
      builder.appendWhere(Photos._ID +
            " = " +
            uri.getLastPathSegment());
      break;
   case ENTITY_LIST:
      builder.setTables(DBSchema.LEFT_OUTER_JOIN_STATEMENT);
      if (TextUtils.isEmpty(sortOrder)) {
         sortOrder = ItemEntities.SORT_ORDER_DEFAULT;
      }
      useAuthorityUri = true;
      break;
   case ENTITY_ID:
      builder.setTables(DBSchema.LEFT_OUTER_JOIN_STATEMENT);
      // limit query to one row at most:
      builder.appendWhere(DBSchema.TBL_ITEMS +
            "." +
            Items._ID +
            " = " +
            uri.getLastPathSegment());
      useAuthorityUri = true;
      break;
   default:
      throw new IllegalArgumentException(
            "Unsupported URI: " + uri);
   }
   Cursor cursor =
         builder.query(
         db,
         projection,
         selection,
         selectionArgs,
         null,
         null,
         sortOrder);
   // if we want to be notified of any changes:
   if (useAuthorityUri) {
      cursor.setNotificationUri(
            getContext().getContentResolver(),
            LentItemsContract.CONTENT_URI);
   }
   else {
      cursor.setNotificationUri(
            getContext().getContentResolver(),
            uri);
   }
   return cursor;
}
After creating a new object you first define into which table(s) to insert. Then you might want to add a default sort order if none is specified by the caller of your code. Next you have to add a WHERE clause that matches the id for id based queries before you finally pass all arguments on to the builder's query() method. This method returns a Cursor object which you simply return to your caller.
There is one additional thing though you have to take care of. That is the SQLiteDatabase object you have to pass to the SQLiteQueryBuilder's query() method. I recommend to get access to the SQLiteDatabase object within each CRUD method.
Now you might wonder if I ever close the object. Well, I don't 🙂 But this is no problem. SQLiteOpenHelper keeps just one SQLiteDatabase object per SQLiteSession. This makes accessing the object very efficient. With version checking and all that is happening in the background it wouldn't work too well otherwise. I will delve into all these details in one of my upcoming posts within my SQLite series. So for now simply believe me: There is no leak here! If you use just one SQLiteOpenHelper object within your app you will only have at most one SQLiteDatabase object at any time - unless you pass this object needlessly around and leak it that way. Finally: Android destroys the content provider when it's no longer needed and cleans up any ressources. Very convenient!
Updating and deleting records of your content provider
The code for updating and deleting records looks pretty much the same. I'm going to show you how to update records and afterwards I will briefly describe the necessary changes for deleting.
@Override
public int update(Uri uri, ContentValues values, String selection,
      String[] selectionArgs) {
   SQLiteDatabase db = mHelper.getWritableDatabase();
   int updateCount = 0;
   switch (URI_MATCHER.match(uri)) {
   case ITEM_LIST:
      updateCount = db.update(
            DBSchema.TBL_ITEMS,
            values,
            selection,
            selectionArgs);
      break;
   case ITEM_ID:
      String idStr = uri.getLastPathSegment();
      String where = Items._ID + " = " + idStr;
      if (!TextUtils.isEmpty(selection)) {
         where += " AND " + selection;
      }
      updateCount = db.update(
            DBSchema.TBL_ITEMS,
            values,
            where,
            selectionArgs);
      break;
   default:
      // no support for updating photos or entities!
      throw new IllegalArgumentException("Unsupported URI: " + uri);
   }
   // notify all listeners of changes:
   if (updateCount > 0 && !isInBatchMode()) {
      getContext().getContentResolver().notifyChange(uri, null);
   }
   return updateCount;
}
First you once again use your UriMatcher to distinguish between dir based and id based URIs. If you use a dir based URI, you simply pass this call on to the SQLiteDatabase's update() method substituting the URI with the correct table name. In case of an id based URI you have to extract the id from the URI to form a valid WHERE clause. After this call SQLiteDatabase's update() method. Finally you return the number of modified records.
The only changes you have to make for your delete() method is to change the method names and to get rid of the ContentValues object. Everthing else is exactly as shown in the update() method's code sample.
@Override
public int delete(Uri uri, String selection, String[] selectionArgs) {
   SQLiteDatabase db = mHelper.getWritableDatabase();
   int delCount = 0;
   switch (URI_MATCHER.match(uri)) {
   case ITEM_LIST:
      delCount = db.delete(
            DBSchema.TBL_ITEMS,
            selection,
            selectionArgs);
      break;
   case ITEM_ID:
      String idStr = uri.getLastPathSegment();
      String where = Items._ID + " = " + idStr;
      if (!TextUtils.isEmpty(selection)) {
         where += " AND " + selection;
      }
      delCount = db.delete(
            DBSchema.TBL_ITEMS,
            where,
            selectionArgs);
      break;
   default:
      // no support for deleting photos or entities -
      // photos are deleted by a trigger when the item is deleted
      throw new IllegalArgumentException("Unsupported URI: " + uri);
   }
   // notify all listeners of changes:
   if (delCount > 0 && !isInBatchMode()) {
      getContext().getContentResolver().notifyChange(uri, null);
   }
   return delCount;
}
Lifecycle
As with all components Android also manages the creation and destruction of a content provider. But a content provider has no visible state and there is also nothing the user has entered that should not be lost. Because of this Android can shut down the content provider whenever it sees fit.
So instead of the many methods you usually have to take care of in your activities or fragments, you have to implement just this one method: onCreate(). Keep this method as fast as possible. It runs on the UI thread when your app starts up. So it has to be fast otherwise the first impression with your app won't be too impressive.
Normally that's just it. But there are two other callback methods you might want to react to depending on circumstances:
- When your content provider needs to react to changed settings (e.g. the user selected language) you have to implement the
onConfigurationChanged()method that takes a Configuration object as parameter. - When your content provider keeps large amounts of data around (which you should strive to avoid) you should also implement the
onLowMemory()method to release these data.
Configuring your content provider
As with any component in Android you also have to register your content provider within the AndroidManifest.xml file. The next code sample shows the configuration of the sample content provider.
<provider
   android:name=".provider.LentItemsProvider"
   android:authorities="de.openminds.samples.cpsample.lentitems"
   android:exported="true"
   android:grantUriPermissions="true"
   android:label="LentItemsProvider"
   android:readPermission="de.openminds.samples.cpsample.lentitems.READ"
   android:writePermission="de.openminds.samples.cpsample.lentitems.WRITE" />
You use a <provider> element for each content provider you want to register. Of its many attributes you usually will use authorities, name and possibly one of the permission attributes.
The name attribute simply is the fully qualified class name of your ContentProvider subclass. As always it is possible to use a simple "." for the default-package of your application.
I have explained the rules for authorities in detail in the post about content provider clients. It should be akin to Java's package naming conventions and must be unique among all content providers on any device it is going to be installed on. So don't be sloppy with the provider's authority.
Think about necessary permissions
As you have seen above, you can - and probably should - add restrictions to your content provider. By using one of the permission attributes you force clients to be open to their users about the use of your content provider's data.
If you do not export your content provider this is no issue for you. But if you do, think carefully about what you want clients to be able to do and how to set permissions accordingly.
I do not cover permissions in this post, but will write about them in a follow-up post.
Consider exporting your content provider
Content providers allow you to share data among apps. That's the main reason they were created in the first place:
Content providers are the standard interface that connects data in one process with code running in another process.
Or as Cyril Mottier has put it in a post on G+:
Uri are only here to fulfill the Android original leitmotiv: being able to share data from one process to another (usually via ContentProvider).
I very much like this idea of sharing data on Android. And I would like if more apps were exporting their provider. Any.DO does that very well. They have published their contract class and have added a blog post describing Any.DO's provider.
Less open is Martin van Z about the content provider for his app Note list. But he nevertheless offers interested app developers help if they want to use Note list's data - he doesn't release his contract to the world though.
I personally would like to see exported content providers more often. Way more often. Of course not all apps can do that, but please: At least consider it. Especially if your app is on the brink to getting successful, additional widgets and extension apps might make the difference.
And since we're at it: I would very much like to be able to query an existing content provider for his available tables, columns and the like. That's not possible as of yet. But it would make exchanging data among apps that much easier.
Anyway: No matter whether you want to export your data or not, you probably should explicitly set the exported attribute to the value you need. Before Android 4.2 the default for this attribute has been true. Probably too many forgot about permissions, so the default since 4.2 has changed to false. So your best bet to not accidentally get into trouble (e.g. when changing the minSdkVersion) is to explicitly set this attribute.
When to use content providers
As described in the introductory post, one reason to use content providers, is to export data. So, should you use content providers only to provide data to external applications? Or when would it be appropriate to prefer them for your own application over directly accessing the database?
I recommend to use a content provider whenever your app needs to react to changes in the underlying data store - even to changes from within your app itself. And this of course is more often true than not. You might for example have a ListView which displays summary information of the data held in your data store. Now if you delete or add an entry and return to your list the list should reflect these changes. This is easily done using a content provider in combination with using Loaders. Using the database directly you would have to trigger a new query on your own.
You must use content providers if you want to use search suggestions. In that case Android leaves you no choice.
Android also demands that you use content providers with sync adapters. But contrary to search suggestions you can work around this requirement with a stub provider. But, well, I like content providers, so I recommend to use a proper one with sync adapters.
Object oriented facade
You have seen that content providers provide a relational interface to data. This of course clashes with object-orientation. For this reason you might want to consider wrapping the content provider with a more object oriented interface. For an example look at Jason Wei's blog post about an object-oriented wrapper.
The downside to this of course is that Cursor objects are commonly used in the Android library. Thus even if you follow this approach you should add a method that allows you to get the Cursor directly.
Sample project
All sources for this post are available in the sample project on bitbucket.
Lessons learned
With what I have described in this series you know why there are content providers in Android in the first place and when to use them. You are now able to use Android's built-in content providers as well as create content providers of your own.
Of course not all details could be covered but you should have a solid basis to digg into Android's API and to understand what is discussed on blogs, forums or on Androids mailing lists. If you liked this content, you might want to subscribe to my blog. I am going to dig into content providers in more detail in follow up posts. Until then, happy coding!
This post is a revamped version of the original post. Some comments might seem out of date because of this.