The sample app for my post about ActionViews is on Bitbucket. Besides Actionviews it serves also as the sample app for how to add ActionBarSherlock to projects, and for adding action items from within fragments.
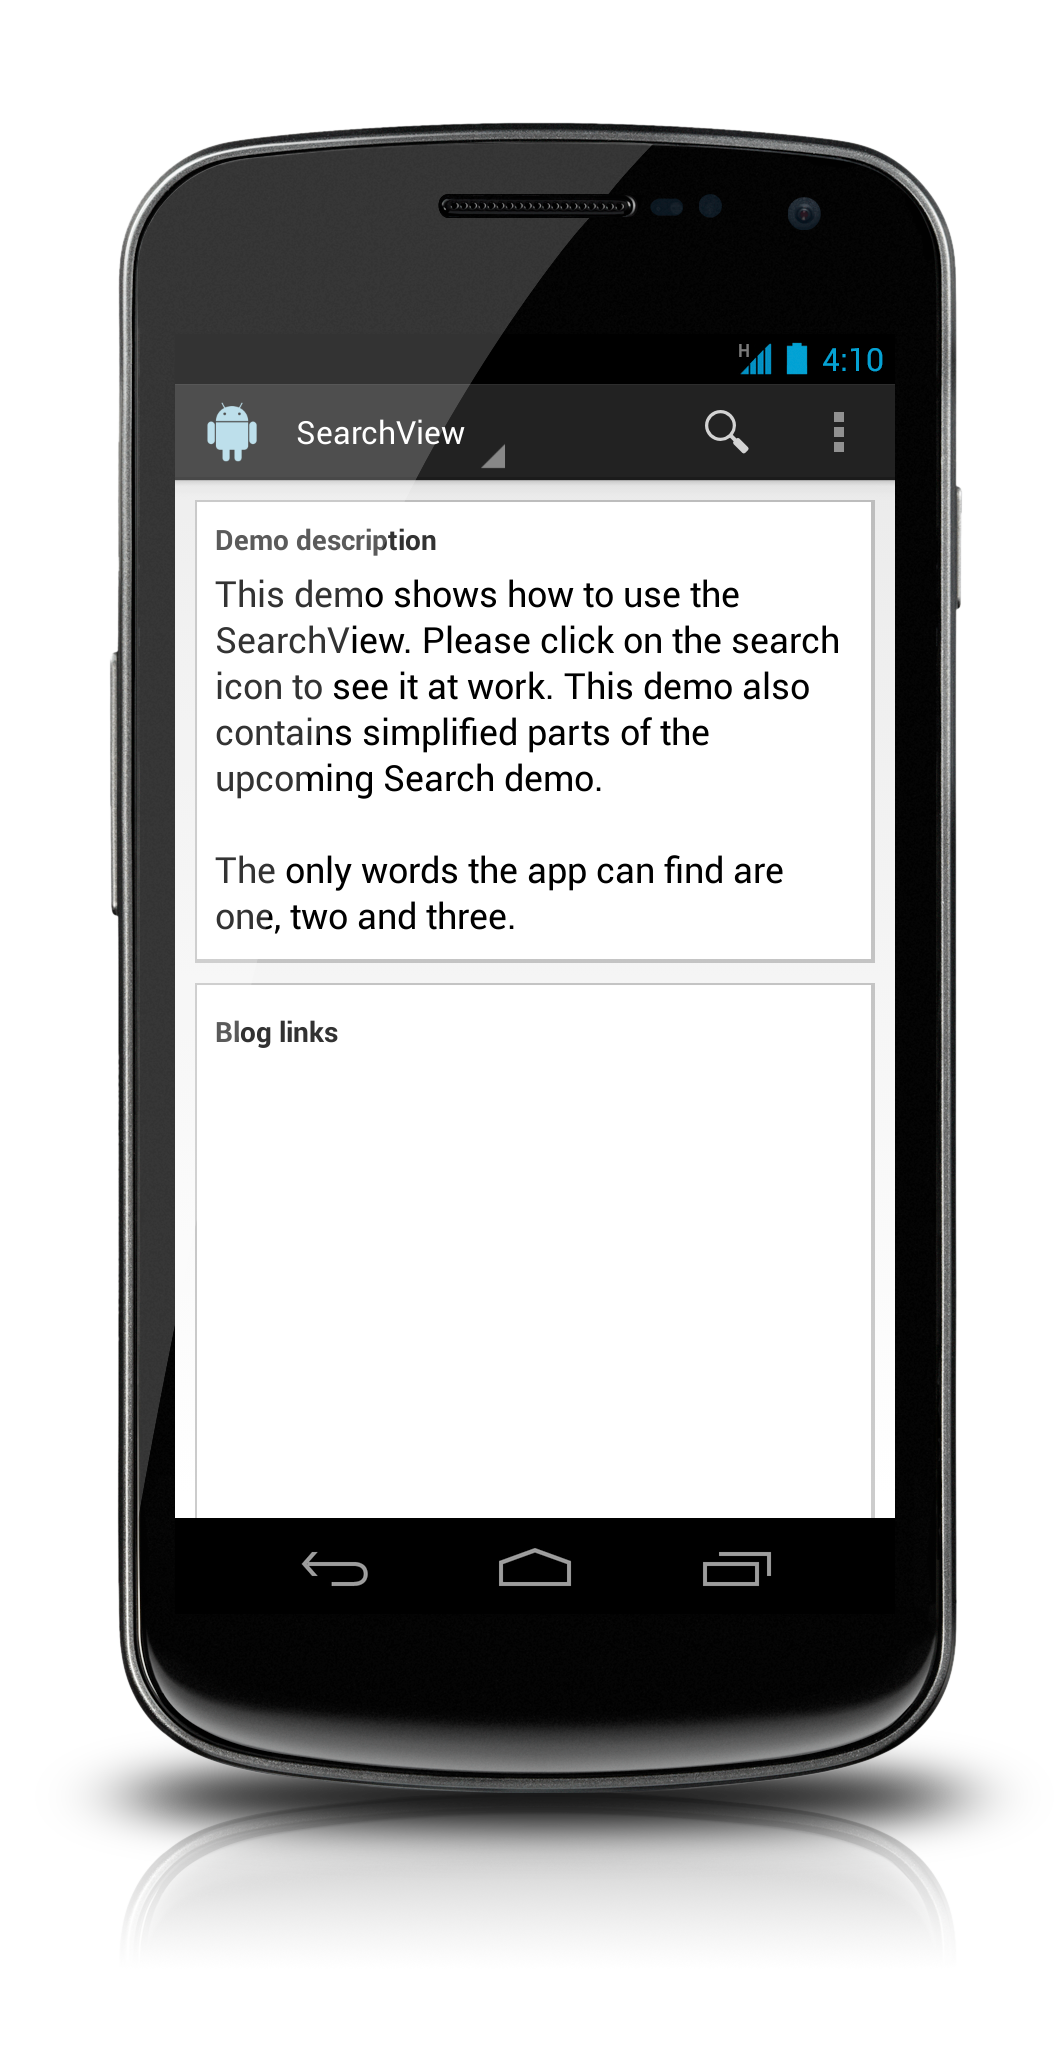
Here's a screenshot of the demo:

I plan on generating the scaffold for my demo apps so that I only have to add specific stuff and keep my work for the demos to a minimum. That on the other hand makes some parts of the code look a bit weird, others look pretty generic. You wouldn't do it that way for a single purpose project.
Since I like to blog about what is happening to me while developing apps, I use this post to tell you about three useful Android tools that I used while developing and preparing this app for release.
The first two can be used to analyze the UI, the third is useful for spotting problems with stuff you might miss because you are too knowledgable of the way your app works.
HierarchyViewer vs. UI Automator Viewer
UI Automator Viewer is a tool that was released with Android pretty recently (sometime last year). According to the Android site it can be used to Analyze your Application's UI. In fact it is a very nice tool to quickly get an overview of how the UI of an app is structured. UI Automator simply grabs the screen and shows you all views present. Here's a screen of the Play Music app:
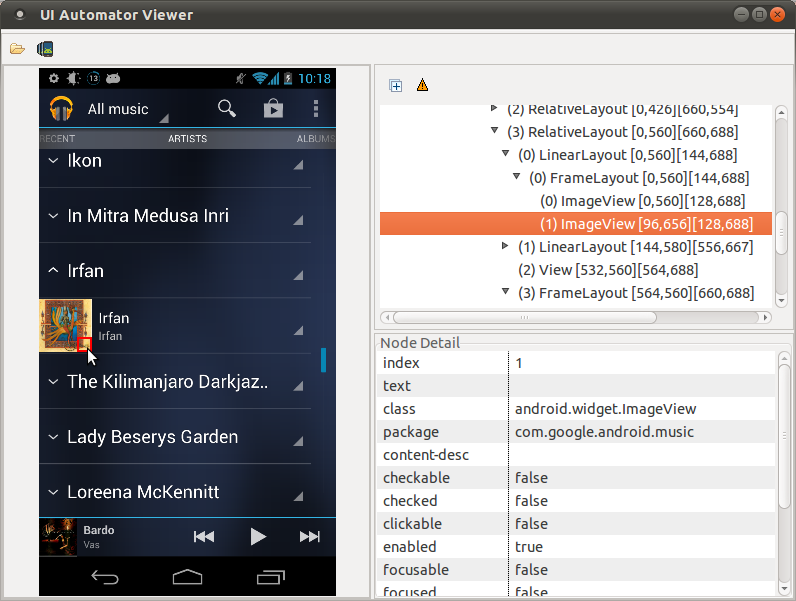
On the left is the UI, on the right the hierarchy at the top and some properties of the currently selected element at the bottom. As you can see I have selected a tiny image at the bottom right corner of the album shot (whatever it is for).
But the big downside of this tool is that it only shows what you can see. And if you wonder, why something is not visible, it can't help you. Which I learned the hard way some days ago 🙂
I extracted parts of the container's attributes to a common style. Then I applied this style to the other containers and deleted unnecessary attributes. And by doing so I deleted one attribute too many of a LinearLayout - the android:orientation attribute. A LinearLayout is horizontal by default and since I already had a TextView inside the container (the box header) any additional view wouldn't be visible.
Lint normally warns about that, but in my case I add the views in the code - and thus Lint couldn't catch the problem. This silly mistake caused me to look in all directions, but not the right one. For way too long!
Here's what it looked like:
In retrospect it's obvious what went wrong and I wonder why I thought of other reasons at all, but well, one is always wiser in hindsight 🙂 I finally found the missing attribute using a plain old diff and having a closer look at what I actually had removed. But I could have spotted it earlier, had I known about UI Automator's restriction to visible UI elements. There is a button "Toggle NAF Nodes" but that doesn't help here either. This button is only useful to see elements which are visible but not reachable via navigational controls like a D-pad.
Another Android tool, HierarchyViewer, could have saved me. This tool is so darn slow that I never really liked it. Which is why I had hoped (thought, actually) UI Automator Viewer would be enough.
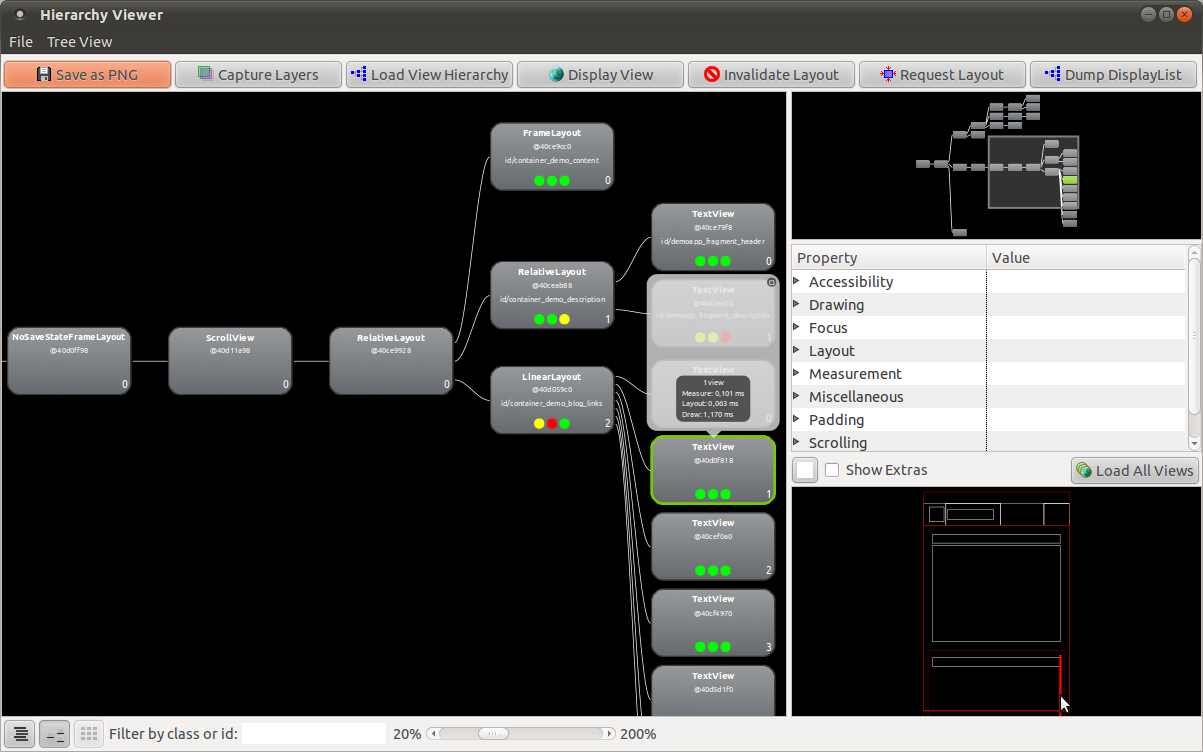
HierarchyViewer can be extremely useful, though. It really shows any view that is part of the hierarchy. Visible or not! So let me show you the hierarchy of my demo app, before I corrected my LinearLayout's orientation in both tools.
In HierarchyViewer I immediately see that all my links had been added. But they were outside of the right edge of the screen. The bold red line is where my view is 🙂
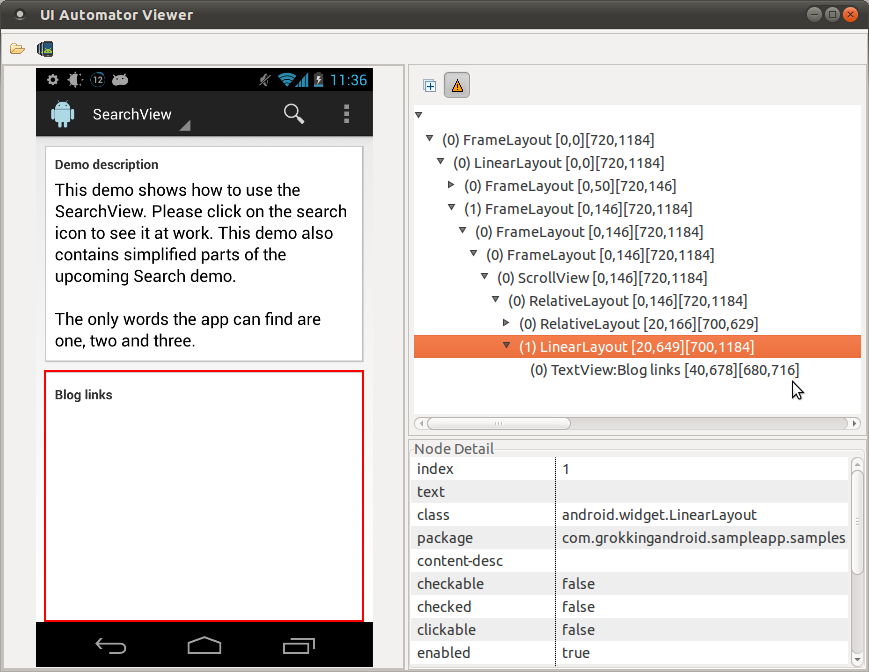
Now the same view in the UI Automator Viewer (with the NAF toggle on):
So, don't get me wrong: I know that UI Automator Viewer's main task is to analyze your UI before writing uiautomator tests, but it would have been nice nonetheless if it could have been used for this as well. It's a much nicer tool than Hierarchy Viewer.
Monkey
As a last step before releasing, I did a Monkey run. Monkey is a tool that simulates random clicks and interactions with the devices. No user would do it that way, obviously, but by doing so monkey uses combinations and clicks on places you never would do.
By executing it's random actions, Monkey helps you to find weak spots like Application Not Responding problems or unexpected crashes at odd places. Monkey uses the app in unexpected ways. Ways, of which we think, that no user in his right mind would choose them. But users do! Not because of their state of mind, but because the UI is not as intuitive as we thought. Or because they try to achieve goals that we didn't think of.
While Monkey runs, the screens of your app flash in quick succession and you see all kind of button presses and so on.
As soon as a problem appears, Monkey stops and shows a modal dialog. One of the very rare cases where a modal dialog is okay. While monkey is running the devices isn't usable anyway - and you want to see when something goes wrong.
A warning though: Do not use Monkey for arbitrary apps on your device. As I've said, it does all kind of things - which means that your data is probably in a bad shape afterwards 🙂
With that said, it's finally time for you to go over to the Bitbucket project page and grab the sources. Let me know any suggestions you have. Thanks!